Introduction.
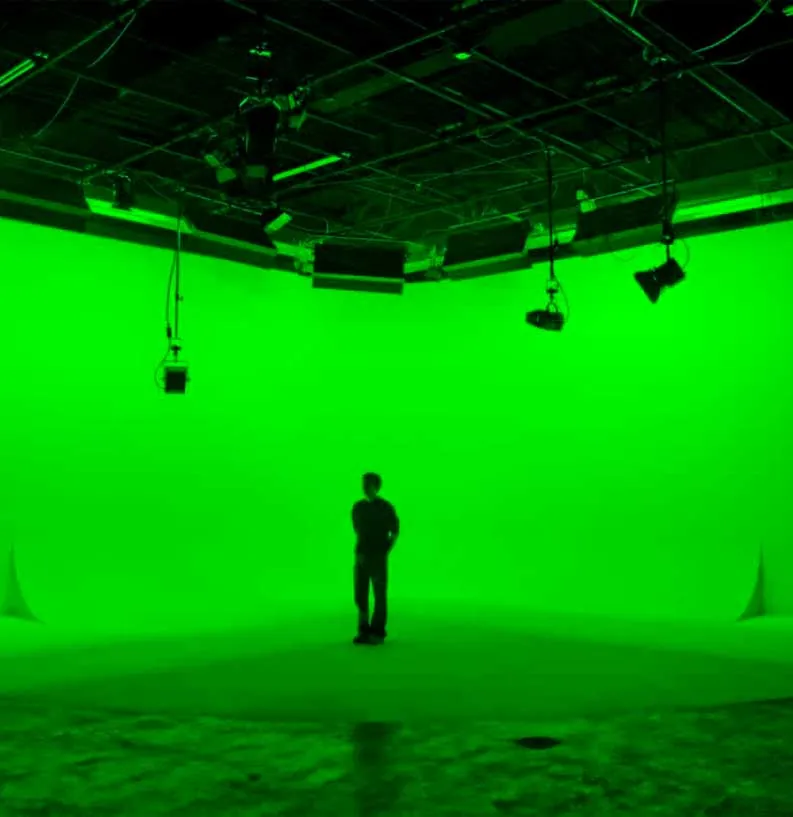
Chroma keys or colour keys are a cinematic technique used by productions of all sizes, mainly for compositing backgrounds through CGI (Computer Generated Imagery), and which is generally done under the supervision of a VFX (Visual Effects) specialist.
The idea of the technique is to have a uniform base on which moving objects stand out, which is why base colours such as blue or green are used.
Nowadays, the power of editing and effects software is capable of interpreting a chroma that isn’t perfectly uniform; nevertheless, it’s always worth seeking the greatest possible uniformity in order to use less work during post-production.
Understanding exposure when lighting a green screen.
Before lighting a background, you always have to take into account the aperture you’re going to work with, whether you’re lighting a chroma or not.
Contrast ratios go hand in hand with the aesthetic you give to the product you’re filming, and that’s why understanding how the background acts on the character is imperative.
In the case of chroma keys, you need the background to be within the video signal you want for the character, so you’ll start from an exposure value set by the aperture you’ve already decided to work with. Since — and this will be explained a little later — the least convenient thing about a chroma is the “colour spill”, that is, the colour contamination on the character, the background lighting is usually estimated at half of that of the foreground. To do this you can use tools such as the light meter, or tools built into the camera and previsualisation methods such as false colour.
Lighting the background.
Let’s start from the premise that your set-up is for an interview, one or two static characters in front of the green screen. If you look around a bit, you’ll find that getting hold of some photo tripods and a reasonably sized green screen is more than affordable; they even come in packs, and with that you can start running tests and play around a bit. To avoid headaches for your VFX editor, the main objective is to achieve uniform lighting — that is, not to find any hot spot on the chroma. To achieve this, the best thing is to light it from both sides with large light sources. Preferably use fluorescent or LED panels with diffusion; some that work wonderfully are Westcott’s Flex Cine ones. But there are more affordable options on the market that will probably fit all kinds of needs.
If you only have more focused units, such as a 2K tungsten, use diffusion. The best thing is to put a small frame on each one, about 30cm away, that covers the beam completely, and another, larger one in front of it — the greater the distance between frames, the greater the diffusion of shadows.
As the size of the chroma increases, the more light you’re going to need, but always bearing in mind the uniformity we talked about. At the same time, it’s important that the units be the same, since working with different lighting sources can result in different exposures or, worse, two colour temperatures.
The background must always remain at the same exposure and colour-temperature values; remember that it’s going to become a virtual background and it isn’t affected by how you light the character.
When you’ve achieved a uniform background with an exposure value within your video signal, decide where your character will go and make the necessary cuts with flags so that light doesn’t contaminate your subsequent lighting.
Always remember the inverse-square law and the reach the bounce of the screen you’ve placed behind the character will have when positioning them in front of it. Then you’re ready to start lighting your foreground.
Lighting the foreground.
When it comes to lighting the foreground, you have to keep several things in mind: the physical distance at which you can place it relative to the chroma, whether the character is going to have any kind of movement, the number of units you have to light it and, above all, what we’re going to see in that background afterwards.
- The distance is set by the inverse-square law, already mentioned earlier, since the green screen we’ve lit has become one more light source and we don’t want it to interact with the main action. Place the character as far away as possible, as long as they never leave that green background. The moment what’s called colour spill appears, post-production becomes more costly, both economically and time-wise.
- If you’re dealing with any kind of movement, things change, because you’ll have to take into account where they move and how that affects the background. Your lighting scheme must also account for this movement, since lighting a static character isn’t the same as lighting one who isn’t. On the other hand, if the movement isn’t the character’s but the camera’s, you’ll want to put down track markers; that way, the software will be able to fix the background to a virtual horizon and maintain the parallax in the object-background relationship so as not to lose perspective and achieve a realistic result.
- When it comes to lighting your foreground, you must have done consistent pre-production, where you already know the background that will play in the scene you’re shooting, know where the light comes from, the quality and quantity, your exposure value and depth of field, in order to replicate as accurately as possible the atmosphere in which whatever you’re lighting is going to be found. In the event that it’s an interview, you can always opt for two- or three-point lighting. But what I do recommend is playing with a well-marked backlight to put an end to all the chroma’s reflection problems onto the character, thus avoiding any green halo and, above all, the homicidal instinct of your VFX editor.
Other than that, it’s a matter of trial and error; the best thing you can do is try different techniques and understand how light acts depending on where it comes from, its hardness, the distance and the power. So get shooting, get testing, and to keep learning lighting techniques, visit us every now and then.
And don’t hesitate to comment on how your tests went lighting your first chroma and to ask any questions that come up!